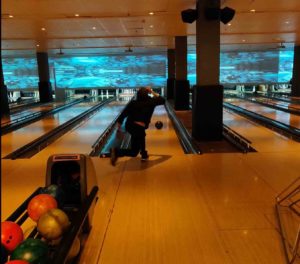

How to build a bowling lane in your basement? Bowling has been a favorite pastime of college students and their families. This game takes a lot of practice, but it’s fun to play as a novice, even if you don’t achieve perfection. Furthermore, few other pastimes can match the thrill of a well-executed assault.
Bowling is a game that has several disadvantages. One of the most significant issues with bowling is having to travel to a bowling alley to play. It’s not an issue if you live close enough. The problem is that they’re drying up, causing people who enjoy bowling to reconsider where and when they’ll bowl.
How to build a bowling lane in your basement? In-home bowling alleys are becoming increasingly popular among this demographic, with more and more of them turning to these outlets to feed their fix. Many of these individuals convert it into a DIY project, and you can too.
This article will show you How to build a bowling lane in your basement. This article will also include a list of more features you may have in the project and a list of common construction blunders to avoid.
Bowling Lane Dimensions
Let’s start with the first step: determining the size and layout of a bowling alley. The overall length of a bowling lane in most bowling alleys and professional facilities is 60 feet. The construction of the bowling alley has 42 inches in width and 2 inches in thickness.
The bowling lane begins 15 feet away from the foul line, with 15 feet before it. Approach dots are used to indicate the start of your run. The starting point is 12 feet from the foul line.
It would be best if you continued to practice your swing. You’ll be able to bowl your finest after you’ve finished reading this article. It will not be deemed if you do not take a shot.
The foul line is 24 feet from the aiming arrows. These arrows are there to assist you in determining the finest trajectory for your throw and remove all of the pins.
The lane’s end is defined by a point on the bottom of the number 1 bowling pin in bowling. The bowling lane terminates here, with gutters running along each side.
Before you consider building your bowling alley, you must understand the components of a typical bowling lane.
Building a Bowling Lane

Let’s start the process of how to build a bowling lane in your basement:
1. Begin By Obtaining Your Materials
Before you can begin constructing your basement bowling alley, you’ll need the following things. Ensure enough room for a water heater in your basement before starting construction.
The following items are acquired in this order:
- Approximately eight sheets of high-quality plywood
- 2x4s that are about 14 feet long
- LED lights
- Primer
- Paint
- Laminate flooring
- Carpet swatch
- Screws
- Pins
- Mini bowling balls
- Wax for bowling alleys
The materials you’ll need to construct a basic bowling alley are as follows. You’ll also need other supplies to create a ball return or pin-setting system.
2. Cut Wood
When you’ve gathered all of these supplies, you’ll need a table saw, and a chop saw. Make all required cuts in your alley after putting on the appropriate PPE.
To establish your lane, gutters, and pin housing, you’ll need to cut down your wood stock.
In this stage, keep all of your cut pieces neat. Before getting started, you should select the lane’s surface material.
To get the most out of your games, you’ll need to sand down your plywood considerably. It’s also possible to utilize wood-grain laminate flooring instead.
3. Assembly of the Lane and Gutters
Once you’ve made all of your cuts, it’s time to assemble the puzzle. Begin by attaching your lane and gutters with your many screws.
Make sure your gutters can hold a small bowling ball before you begin placing them. The size of the gutters should be comparable to the size of the mini bowling ball that you choose. As a result, use those parameters to determine their size.
Before moving forward, check that the entire surface of the lane is perfectly level. Even the tiniest groove or bump at the plywood’s joints may cause unwanted hopping or leap in your pitched bowling ball.
Once the entire length of the pattern has been laid out, you may sand down any grooves if you wish to install a laminate bowling surface right away.
4. Set up the Pin Station and Setter
It’s time to install the pins after the gutters and lanes have been installed. It’s large enough to allow for pin movement, yet not so big that it’s difficult to handle.
A raised back with a piece of carpet padding (to minimize noise) is ideal. PVC pipe, rope, pulleys, and extra plywood can all be used to create resetting systems.
5. Apply Wax and Check
If you choose to maintain the natural wood surface of your lane, you’ll need to apply an even layer of bowling alley wax to finish the job. The process for this delicate procedure should be clearly outlined on the wax container.
After the wax has “dried,” it’s time to put your lane to the test. If you detect issues during numerous rounds of play, your room’s distinctive topography might demand modifications to your design.
It’s best to be forewarned instead of late for executing damage control and recovering from a broken pin. The dangers of building a house bowling alley cannot be overstated.
For example, some DIYs neglect to measure one of the essential phases of this procedure: measuring. It’s difficult to build a full-sized bowling alley in a basement because not everyone has the length required.
Many DIYers overlook the size of bowling equipment they intend to utilize when building their alley, gutters, and housing. For this job, small balls and pins are advised.
However, you can acquire a full-size ball and pin set. Just bear in mind that these things are heavy, difficult to store, and costly.
How Much Does It Cost to Build Your Own Private Bowling Alley?
A home bowling alley may be costly, but it’s a worthwhile investment. For example, if you’re searching for a completely automated bowling alley rather than a handmade DIY wooden plate lane constructed out of IKEA plates.
A genuine bowling alley may cost anywhere from $100,000 to $150,000 to convert a room. However, if you want your conversion to go beyond $150,000, you’ll need a lot of specializations, lighting ideas, atmosphere suggestions, and sitting areas.
If you’re a serious bowler who wants to take your bowling game to the next level, you might be able to do it. You’ll have to spend this much money on your bowling alley. It’ll look fantastic once it’s done.
Conclusions

The sound of a bowling ball striking pins should now be audible. When you’re finished with your in-home bowling alley, it should be able to inspire you to do the same. The resources and time necessary to complete the job are substantial.
Related Articles: